Even if you choose to have your terrazzo tiles professionally placed rather than doing it yourself, you must understand the fundamentals of terrazzo installation. The reason for this is because each stage is equally important to the next, and any errors or missed elements may result in a long and complex repair process.
Preparation of the Surface
The outcome of this phase determines the overall balance of the installation procedure. This procedure is used to prepare the subflooring so that it can form a firm connection with the terrazzo tiles. Post-installation issues caused by improper surface preparation may be very expensive to rectify if they were not detected and corrected in time. Using shot blasting, the surface is given the appropriate Concrete Surface Profile that will accept the specific terrazzo flooring system that will be installed on the surface. Visit https://tileandbathco.com.au/collections/terrazzo-tiles to know things you must know before buying terrazzo tiles online in Australia.
Detailing of Cracks

This process is carried out in order to prevent cracks or fractures from propagating upwards into the terrazzo tiles installation. This is accomplished by applying a flexible epoxy to cracks that have been discovered during surface preparation and then capping them with another flexible epoxy.
Strip Layout
In the event that you want to customize your terrazzo tiles installation with logos, artwork, or any other kind of design, this process must be followed. This guarantees that your artwork is meticulously put out, thus minimizing the possibility of making expensive errors.
Preparation of the Substrate
To establish a solid connection between the substrate and the terrazzo tiles installation, this procedure must be carried out.
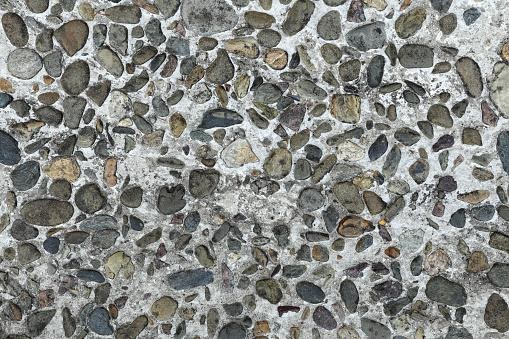
Grinding
This procedure is carried out after the floor has been allowed to cure for at least 24 hours. This is done in order to create a surface that is bright and consistent in appearance. As soon as this is completed, grouting may be used in order to further guarantee that a smooth, non-porous terrazzo tiles installation is accomplished.
Cleaning, polishing, and sealing
This phase is particularly important since there are a number of various finishes available for terrazzo installation, including the basic Sealed Polished Finish, the Machine Polished Finish for low traffic areas, and the Honed Anti-Slip Finish for slippery surfaces.
When done correctly, terrazzo installation will guarantee that your floors come out perfectly and will last for as long as you want them to. With appropriate care and upkeep, your terrazzo installation will be well worth the money you spent to choose it over all of the other flooring options available to you. Click here to read about The Purpose of Divider Strips in Terrazzo Flooring.
Terrazzo Upkeep and Repair
Terrazzo tiles is very simple to maintain clean — particularly if it has been sealed after installation. Terrazzo is also inexpensive. The most dangerous enemy of terrazzo is grit, which must be avoided at all costs in order to avoid scratching the surface. You may sweep, dust mop, or vacuum; just be careful not to use a vacuum cleaner with a beater bar, as this can pull grit into the machine. Then use a neutral cleaner made specifically for stone or terrazzo to wipe it once or twice a week (regular cleaners might be too acidic or alkaline). Rinse well to maintain the gloss. Traditional terrazzo stains more readily than modern terrazzo, so spills should be cleaned up immediately — but the sealer will help resist stains. Check with your installer to see whether you’ll need to strip and reseal your floor on a regular basis.
Terrazzo Installation: Preparation of the Ground
It doesn’t matter whatever kind of terrazzo you select; the installation process will be more time-consuming than installing carpet or hardwood. Many kinds of flooring are suitable for weekend projects or do-it-yourselfers; however, terrazzo is not one of them. Unless, of course, you’re a mason by trade. If you want terrazzo placed in an existing building, you’ll need to hire terrazzo tiles installation professionals that are experts in the field. Each one approaches the task in a slightly different way. However, although I’ve included the three most popular and widely used kinds of terrazzo, there are many variants, and each contractor has its own preferences and specialties. So, let’s assume you’re going to have terrazzo flooring installed.
First and foremost, your contractor will need to inspect your existing sub-flooring. In order to achieve classic terrazzo tiles, a strong concrete foundation is required. In some cases, this may need digging down under your home since there is a sand layer on top of the cement prior to the real terrazzo topping being placed, and you will want it to be consistent with the current floor level in the home. That is a significant amount of time and money, but if you are having it put outdoors, it may not be as significant a commitment.
If you already have a concrete slab and you’re having polyacrylate or epoxy terrazzo tiles, you’ll just need to have it examined to make sure it’s structurally sound and level before proceeding. In addition, your contractor will identify any existing joints in the concrete. Furthermore, certain kinds of epoxy terrazzo may be installed on top of plywood sub-flooring, which is what the majority of us are most likely to have in our houses nowadays.
But, let’s stick with the concrete slab for the time being. Workers will clean it, fix any flaws, and prepare it for the kind of terrazzo tiles you’re receiving, which is called the CSP procedure (concrete surface profile). A thicker kind, such as conventional terrazzo, requires a rougher concrete surface, while thin-set systems, such as epoxy, may be applied to a reasonably smooth concrete surface without requiring a coarser surface. For epoxy terrazzo outdoor tiles, you may additionally need a specific membrane to be applied over the cement to assist prevent cracking and, in the case of terrazzo, to serve as a moisture barrier.
If you choose the conventional route, the following step will be to apply a layer of sand, followed by a coating of cement, and finally the design. Polyacrylate and epoxy, on the other hand, are applied directly to the design. Naturally, this will all be planned out ahead of time, and the details will vary according to the kind of terrazzo being used. Some contractors may print out the design on paper and put it out on the floor, full-size, to demonstrate their intent. What level of information do you require?
Color changes in the design are separated by separating strips, which may be made of plastic, copper, zinc, brass, or other materials — the color can be part of the design, and they can also be of various thicknesses — and they can be of varied widths as well as different lengths. If the pattern is very complex, it may be drawn out on panels of wire mesh ahead of time, or it may even be cut using water jets, and then the remainder of the wire mesh is bent on site. Working jointly with solder, workers adhere the dividing strips to the concrete using glue or other means. The finish line is in sight.